Showing posts with label garden design. Show all posts

Friday, 2 July 2010

Designing a small garden - part 4

This is the 4th (and final!) part of my thoughts on the design of small gardens theme.

The earlier parts are the 3 posts immediately before this one, and can be reached by clicking on these links ...

Part 1 - introduction to why small gardens need designing;
Part 2 - lose the boundaries, borrowed views & landscape, using 3 dimensions;
Part 3 - keep it simple, maximise space usefulness, optical illusions;
Part 4 follows - keep it interesting, growing for the table and utility issues.


7. Keep it interesting:

A garden space planted entirely with unchanging, neatly clipped, evergreen hedging can be a tranquil place to relax, but it will lack the seasonal changes which I think bring vitality to a garden.

A very small garden may not be able to sustain too many changes in form – rounded, conical, arching, cylindrical, horizontal-tiered, vase-like, etc – without becoming too “busy” and seeming cluttered, but changes of texture and leaf colour can add enough variety to ensure it’s not a boring space. Restrained use of flower “fireworks” and foliage changes can create seasonal highlights that keep the interest going.

If you’re using a small tree, try to get value from it with blossom, leaf colour changes and berries – take a look at Amelanchier, Sorbus or Euonymus – or try one with interesting winter bark, such as the Paper-Bark Maple (Acer griseum). Click here for more information on keeping your garden interesting through the winter.


A tree will also provide food and/or habitat for wildlife to add interest to your garden, especially if you allow some of the “hidden corner” beneath it to be old branches, dry dead leaves, or a “bug hotel” made from old bricks, straw, branches, etc contained in some wire or plastic mesh. These will certainly help support insects, birds and maybe frogs/toads or a hedgehog. This year is the International Year of Biodiversity - my post on this explains more about the importance of gardens to wildlife, and how to attract it to your space.


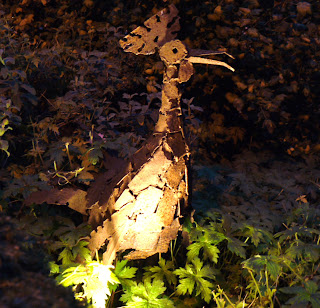
Don’t forget the value of the view out to your small garden from indoors – especially the night-time view, where “nightscape” lighting will be much more economical to achieve than in a larger garden! Click here for more information on garden lighting.

8. Growing for the table:

A small garden is unlikely to give you scope for a regular vegetable garden, but you can still produce some food – espaliered fruit (apples, pears, cherries, kiwi) grown against a sunny house wall; dwarf fruit trees in patio containers (peaches or nectarines); window-ledge containers for herbs, salad crops or stir-fry leaves; potato barrels, strawberry planters or tomatoes in hanging baskets.

Follow these links for more information on window ledge planting and edible flowers.


9. Utility issues:

Practicalities also need to be considered. Unless it’s a small front garden we’re addressing, you’ll probably need a washing line of some kind. Rotary lines are economical in space and can be removed out of the way when not required. Another discreet option is a retractable pull-out line with the spool fixed to the house wall and the extended end hooked onto another wall, well-fixed post, or (perhaps) a strong tree branch.

Waste bins / wheelie bins may need to be accommodated, but could be out of sight behind a hedge or trellis screen.


A compost bin is still a good idea, even in a small garden. If there’s not space to hide a conventional bin (ideally, a timber structure with air gaps rather than a closed plastic composter) there are ornamental “bee-hive” types – just Google “bee hive composter” for retailers.


Unless your garden planting is exceptionally drought-tolerant, plants will need watering in hot/dry periods, especially those in containers & hanging baskets. This is much less work in a small garden! A small garden also makes it very easy to include irrigation for patio containers/planters, hanging baskets and inset borders using a solid-walled hose from the water source taken around the periphery, with smaller tubes punched into the hose taking water to adjustable micro-sprinklers in the pots. These drip-irrigation systems from “Hozelock” are readily available at garden centres and DIY stores, are relatively inexpensive, and can be easily automated with a battery-powered timer at the water tap. Even better, but more expensive, are automatic solar-powered pumps attached to rainwater harvesting butts, such as “WaterWand”.


For collecting rainwater in a smaller garden, there are unobtrusive wall-mounted slimline butts such as the “Prestige” from waterbuttsdirect and others.


That’s the end of my article on designing a small garden - you can reach the other parts via the links at the top of this post, or by scrolling on down through my blog.


If you’re inspired by these ideas to have a more adventurous attempt at designing your small garden – great! If you’re daunted by it and would like some professional help click here to get in touch!

Designing a small garden - part 3

This is the third part of my thoughts on the design of small gardens.

The other parts can be reached by clicking on these links ...

Part 1 - an introduction to why small gardens need designing;
Part 2 - lose the boundaries, borrowed views & landscape, using 3 dimensions;
Part 3 follows, covering keep it simple, maximise space usefulness, optical illusions;
Part 4 - keep it interesting, growing for the table and utility issues.


Here goes ...


4. Keep it simple!

In a small space it’s best to stick to simple, bold shapes – definite circles, rectangles & arcs, rather than serpentine, organic shapes which need space to allow one’s eye to follow their sweep. If the plot is an odd shape use the “lose the boundaries” approach, as described in part 2 of this series, to re-shape it so that the space within the planting has simpler, more definite geometry. This also makes it look thought about when compared to a patch of lawn or gravel “left over” from the shape of the other features.


Don't try to cram in too much - if each direction that you look in has several focal features competing for your attention, there's no restfulness and the whole thing becomes cluttered and feels cramped. Try to keep the main functional spaces open with low-level planting and features.


In similar vein, avoid too many variations in materials - “less is more”. Using the same basic surfacing throughout (i.e. the deck / patio / paths) will unify the space and make it seem larger than one which has timber & paving & gravel & brick & stone & concrete & grass, etc. This works in much the same way that having the doors open and the same flooring throughout a small house can make it seem larger.


5. Maximise the usefulness of space:


Do you really need that bit of lawn?

OK, you need a flat surface for practical usage like sitting and dining spaces, as well as the aesthetic purpose of balancing the planting masses, and a change of texture from deck or paving can add interest – but that can be achieved with gravel or slate chips or, better still, with a pebble/cobbles mix to give more interesting variation in texture - perhaps planted through with small ornamental grasses or perennials around a focal point boulder, bird bath or sculptural piece.


Grass is quite poor ecological value and takes a lot of chemical & water input to remain a good lawn throughout the year – as well as a lot of work.
It can become really tedious to get a mower out for a very small lawn!


In a small garden you may still have distinct areas – dining/BBQ, sun-lounging, shady seating for reading, chatting & socialising. You might achieve this with a very simple rectangular shape which has some parts “cut away” – this adds interest to the shape & sub-divides it to create the various functional areas. The cut-aways could be features such as a firepit or BBQ, herb bed, raised planter, water feature, etc.


If the space is really small, consider using “built-in” features, rather than free-standing ones, to keep the space open for movement and allow you to bespoke the size & scale of the features.


If the plot is long & narrow, or short & wide, setting the main rectangular shapes diagonally, rather than parallel to the house, can increase the apparent length of the shorter dimension. A long, narrow space can also be made to seem less like a corridor by using planting or trellising to partially separate sections of the length into “rooms”, perhaps with views framed through archways to focal features in the next room, so creating the “what’s down there?” added interest.


Do you really need paths connecting the areas, or could a path be “suggested” along the edge of a shape or by stepping stones? When planning the arrangement, remember that a narrow strip encourages brisk movement along the line, a wider strip is still “directional”, but allows a more leisurely pace of transition – whereas a squared (or circular) shape suggests a lack of movement, i.e. a resting place such as a patio.


If you have a flat, or shallow-pitched, garage, shed or house extension, why not consider a green roof (click here for more information) to add more planting space & ecological value?


6. Exploit optical illusions:

This is a biggy!

The directional effect of shapes described above can also work with materials, such as the laying patterns for brickwork / paving and especially for decking. The human brain is always looking for patterns and the eye will tend to follow linear features – so a deck with boards running across the line of sight will emphasize the width of the space, whilst having the boards running with the line of sight will emphasize its length. This effect is seen in clothing design, where striped vs. hooped patterns complement different figures.


Laying deck boards diagonally can make a much more interesting scheme, especially if combined with a change to the opposite diagonal on a split-level deck – and can serve to direct the eye to a focal feature. It’s also practical in that boards are cut obliquely to fit the edges so, if they aren’t perfectly square to the adjacent building walls, there’s no “run out” gap which looks dreadful.


Using horizontal linear timber strips instead of conventional square or diamond pattern trellis for screens also has this directional aspect and can “stretch” a short boundary.


In this example, grooved deck boards are used to give the same effect, and also provide unity with the decked surface.


Other optical “cheats” can be made using mirrors to create false windows or doors in walls which can add apparent depth and provide that “what’s through there?” appeal.


In this picture they are used in a semi-formal arrangement to break up a dark, unattractive boundary and add the impression of depth beyond.


They also work really well when the mirror edges are concealed by other planting, or within false framing (e.g. “perspective” panels), and the reflection from the mirror is another part of the garden space, not the viewer – i.e. ensure the mirror is angled slightly. A large mirror, perhaps with ivy trailing over it, at the back of an arch can make it appear deeper – more like a pergola offering a walk-through to another part of the garden space.

Mirrors will always need to have a rigid surface to mount them on, both to protect them from cracking and to prevent movement in the wind - so a free-standing mirror needs at least 12mm marine-ply backing, attached to well-fixed posts. If the reflection is to be seen from some distance away (e.g. from inside the house), make sure it’s very optically flat – slight ripples in the glass produce only minor distortion when seen from a few feet distance, but give a “hall of mirrors” nightmare when seen from 20 or 30 feet!

Another optical trick is using a series of vertical poles where the gap between them reduces along the run, and/or, the poles themselves reduce in height & thickness. This produces a very exaggerated perspective which makes the depth along the run look much greater. If you use this beware of the distorted look when viewed from the opposite direction!


Wall murals may not provide realistic illusions, but can certainly improve the view of a close, uninteresting, neighbouring wall.


Making good decisions with your planting can also help in this optical illusion field.


Bright colours such as orange, yellow & red “advance” – i.e. they seem to jump out at you, so the object appears closer – useful for “shortening” that long, narrow, corridor space. Conversely, muted colours such as blue, mauve, silver/grey and pale green “recede” – making the object appear further away. The effect of colour also changes with the daylight – oranges, reds and yellows “sing out” at dusk, especially when there’s a good red sunset.

Texture has similar visual properties – small-leafed plants provide a “bland” uniform texture which recedes, whereas large-leafed plants with a more open, architectural form advance, making them good focal points. Judicious use of these characteristics, blending in a few advancing features against a receding background can give a greater sense of depth to the view and add to the illusion of space.


The other parts of this series can be reached by scrolling through my blog, or by clicking the links at the top of this post.


Thanks for persevering!

Thursday, 1 July 2010

Designing a small garden - part 2

This is the second part of my thoughts on the design of small gardens.

The other parts can be reached by clicking on these links ...

Part 1 - an introduction to why small gardens need designing;
Part 2 follows, covering lose the boundaries, borrowed views & landscape, using 3 dimensions;
Part 3 - keep it simple, maximise space usefulness, optical illusions;
Part 4 - keep it interesting, growing for the table and utility issues.


Following on from my introduction about why small gardens still need to be designed, here are my first 3 guidelines for anyone who wants to do the design themselves, or to understand some of the thinking that a professional designer will do for you:


1. Lose the boundaries:
Some people think that having borders planted with medium-tall shrubs would “shrink” the available space and feel claustrophobic, but such planting can hide the walls / fences so that the boundary no longer exists – and if there’s no visible boundary your imagination will let you perceive the space as being bigger, not smaller. This can work particularly well if your neighbour (on the other side of the wall/fence) has planting which is taller than your own ... which leads on to ...


2. “Borrow” outside views & landscape:
If there’s a fabulous view outside your garden, you don’t need me to tell you it's OK to break the first guideline and not to hide it – instead, you can organise planting & features to minimise the barrier (fence, etc) between your space and the view, and to “frame” the view to enhance the feeling that it’s part of your visual space. In the classic large estate gardens, the usual device for separating the formal gardens from the pasture land or deer park beyond was the “ha ha” – a wall which is at ground level on the viewing side (formal garden) but which is at the edge of a ditch on the pasture side. You probably won’t be able to do this, but the principle of a near-invisible boundary could be achieved with basic post and wire mesh fencing.


Of course, great views don’t have to be the rural idyll – cityscape views can be sensational too – especially if there’s some interesting architecture, maybe a river, bridge or city park, or even some kinds of industrial architecture to look out on. After all, that’s one of the reasons why rooftop gardens are popular with city dwellers.


If you’re part of a suburban estate, with nothing worth looking out on, your “views” will need to be within your garden space and you’ll probably want reasonably high walls or fencing for security & privacy – but you may still be able to “borrow” bits from outside your space.


Does your neighbourhood have trees that you can “adopt” by visually linking them to your plan? Concealing the boundary fence using shrubs or small trees within your garden to sweep the eye up to the neighbouring trees will bring them into play as part of your scheme.


3. Use 3 dimensions:
As just noted in guideline 2, pay attention to the vertical space.
Use a small tree (or, if space permits, a group of small trees, or a multi-stem tree), with under-planting, in as deep a border as you can make, to gain maximum use of planting space. With the exception of very thirsty trees such as Poplar and Willow species (which are far too big for a small garden anyway), a tree that’s of a size to be in scale with your garden is unlikely to cause damage to modern 1-metre depth foundations – but, if you’re concerned about the proximity of a tree to your house or garage, get some professional advice from a qualified designer, tree surgeon or tree nursery.
If a tree isn’t possible, use pergola or screens to support climbing plants, to add a shady spot or to create depth through the light and shade patterns. Make use of tiered pots or planters to gain height and attention for smaller plants.


Please scroll through my blog for the other parts of this series, or use the links at the top of this post.


Thanks for dropping by!

Wednesday, 30 June 2010

Designing a small garden (1)

This is the first part of my thoughts on the design of small gardens.

The other parts can be reached by clicking on these links ...

Part 1 - Follows and is an introduction to why small gardens need designing;
Part 2 - lose the boundaries, borrowed views & landscape, using 3 dimensions;
Part 3 - keep it simple, maximise space usefulness, optical illusions;
Part 4 - keep it interesting, growing for the table and utility issues.


In social conversations, such as when chatting about "what do you do?", I sometimes get the reaction “oh, my garden’s too small to need designing” – but I beg to differ!


I do this based on 2 axioms:
  • firstly that the most successful way of designing a large garden is to link together a series of smaller, human-scale, self-contained areas – often referred to as garden “rooms” – an approach used in the classic English gardens at Hidcote and Sissinghurst. The design of the garden as a whole is about the location, shape, proportion and flow of these smaller spaces and the routes which connect them – but the character of each smaller space is unique, so the task becomes one of designing a series of small gardens;

  • secondly, even with a small garden, you’re as entitled as anyone else to desire an outside space that’s beautiful, enjoyable, restful, productive, property-enhancing, ... and so on.


Obviously, a small garden has a certain sense of scale and doesn’t provide the opportunity to have large trees, massed shrub plantings, swathes of bulky ornamental grasses, a wildflower meadow or an extensive pond – features that may well be used as part of the overall landscape between the garden rooms in larger estates – but that doesn’t mean they are free of design challenges. The training & experience of a professional garden designer can help to get the best from a small space in terms of usefulness, adaptability and adding value to the property.


If you fancy having a go yourself at achieving a more attractive result than the “2-foot-wide flower border around the fence with a randomly-shaped grass lawn alongside the builder’s patio” that’s often the norm for small suburban gardens, the other parts of this article will give a series of guidelines that will help you get there. You can easily reach them by clicking on the links at the top of this post.

Thursday, 1 April 2010

Using Vectorworks to Montage Designs & Photos

I've found that I can exploit my skills with Vectorworks to combine designs with photo images, making it much easier to show a designed feature "in situ" when it's not appropriate to develop a full design model.

As part of my garden designs, there’s almost always some form of structure required to provide a specific function – for example “built-in” tables & benches for a deck; planter-walls to help define a shape; a pergola over a pathway to frame a view and give vertical planting support; a gazebo to stop and take in the views and to act as a focal point itself; or a screening panel to enclose an area or separate it from another space with different character.

All of these items are part of the overall design concept, which is unique to that property, and will therefore “belong” to the garden even if they are made from widely-available component parts.

Sometimes though, either for practical reasons such as specific dimensions, or aesthetic reasons like needing a particular material / texture / form / etc, only a bespoke piece will work. Often this will be a timber or masonry construction, but I’ve also designed using plastics, ceramics and metals.

One recent example was a small screen panel which I commissioned from Colin Phillips, a designer-blacksmith.

The screen was needed to finish off the return edge alongside a small decked area which you can see in this picture.

I wanted to tie in with the terracotta colour of the alcove wall and the copper rain cups, so I decided on a series of randomly-sized copper & stainless steel sheets set inside a black steel framework – in a kind of “Mondrian meets Rennie Mackintosh” style.

The basis for this was taken, with his permission, from part of some gates pictured on Colin’s website.


I thought it would be interesting to show how I took this through to the finished piece – all done using the Vectorworks CAD package, with Windows Photo Gallery to crop pictures – not even a hint of Photoshop!


First step was to copy the website picture to the Windows clipboard and paste in into a blank Vectorworks layer, which I then exported back as a JPEG image.

Next, I cropped the central bit of the gates, shown above as a black rectangular frame, using Windows Photo Gallery and imported this back into Vectorworks. I then used the Vectorworks “edit – duplicate” function to copy it, and shifted the duplicate sideways to create the rounded base shape with asymmetric left & right sides shown under the original picture of the gates. With these images selected, I used the “modify – scale objects” function to re-size the pictures so that the vertical dimension matched my requirements of 2 metres.

I could then trace over the image to get the basic “ladder” form that interested me before deleting the photo images of the gates and working on to produce my final design.


Once the design was completed, I imported the original photo of the deck area to another layer, again used “modify – scale objects” to resize it - using the brickwork alongside the screen position as a measurement guide - and duplicated the screen design onto this layer, moving it around to superimpose it in the correct position.


Finally I cropped this layer, using a viewport, and printed it to show my client, before commissioning the piece.


The final picture is the finished install of the custom-made screen.


Wednesday, 2 December 2009

Walking Around a Garden Design

Using 3D Animation in Vectorworks Landmark
.
A short while ago, I blogged about Tamsin Slatter's book "Residential Garden Design with Vectorworks Landmark". With the help of this I've now mastered some of the skills of using Vectorworks to develop 3D representations of a garden design, and I've explored further into this, including the animated "movie" facility. So here's a short sequence which allows a client to "walk around" the design and see how it suits them.
.
.
.
At this stage it may not be the most impressive artwork, especially the robotic-looking human figures, but even they help to give the animation a sense of scale - and my clients get a much better feel for the design than could ever be achieved from a 2D plan or sketch view.
.
The next 2 clips show an animation of the sun sweeping around the garden so that the shadow effects of the house, structures and planting can be explored. The animation is set for the summer solstice (June 21st), but could be changed to explore how the light & shade work at other times of the year.
.
.
.
.
For the "techies":
.
My walk around animation is a "move along path" camera using 20 normal perspective views, rendered using "final quality Renderworks". I specified it at 10 Quicktime fps, so there's around 270 frames in the sequence. On my HP laptop (Windows Vista, Core-2 Duo T5800 2.0Ghz processor, 3GB RAM) it takes not far short of 2 hours to generate! The animation seems a bit "hurried" and plays much better at 1/2 speed in Quicktime, so I should probably slow it to "time scale 0.5" when I generate it - next time I've got 3 or 4 hours of idle time on my machine!!! The other 2 clips are "solar animations" using a high elevation orthogonol view and a normal perspective view. These take about 40 minutes to generate at 10 fps.

Wednesday, 11 November 2009

Residential Garden Design with Vectorworks Landmark

“Residential Garden Design with Vectorworks Landmark”
by Tamsin Slatter


This is a great book! Or, perhaps, I should say “a great manual” since I don’t suppose there are too many sad people like me who would take it to bed to read!


For anyone completely unfamiliar with “Vectorworks” here’s a brief bit of background. When I first started out from my college Garden Design course, I tried out several of the very cheap “design your own garden” programs before giving up and returning (literally) to my drawing board. I’m not saying that these programs don’t have their place – but that isn’t in the toolkit of a professional designer. A couple of years ago, I looked again at professional-level CAD packages and decided that, for me, Vectorworks looked the best and that it would be a worthwhile investment for my business. I opted for the “Landmark” and “Renderworks” components, in addition to Vectorworks itself (there are other components specifically for Interior Design, Architecture, Engineering and so on), which together provide huge capability – but, unsurprisingly, with a huge learning curve to become truly proficient and efficient in their usage.

I took a 20-hour training course and, after an initial delay due to other work commitments, started to use the package for my design work. With practice, I got fairly good at drawing up my surveys, working up concept plans, hard landscape construction drawings and soft landscape planting plans. What I hadn’t got to grips with, because it seemed too difficult, was using the 3D modelling capabilities – hence I was not making use of Renderworks, nor offering my clients the benefit of 3D views, with lighting and shadow shown at different times of day, or seasons of the year. Instead, I resorted to separate hand-drawn sketches or simple Google Sketchup models. This also meant that I was putting in extra effort developing isolated section views of construction drawings in addition to the plan views and the hand-drawn sketches.
...
That’s where this book comes in!
...
Tamsin prepared this book for Nemetschek, the developers of Vectorworks. She has excellent credentials for this – 20 years working for IT software companies before retraining as a garden/landscape designer, learning to make best use of the Vectorworks CAD system and becoming a renowned trainer and the UK’s leading expert in the software. In addition to this expertise, she has a personality, which really comes across in the friendly “sitting next to Nellie” style of this book.

So why’s it so good?

Firstly, the concept: It’s a project-based workbook which takes you on a journey from when you first, excitedly, fire up Vectorworks after installing it on your machine, into how it looks & feels, how to set up an efficient & effective “virtual drawing board”, and into the design workflow based on a sample project. This goes right from bringing in a survey file or drawing up your own survey data, through developing a draft plan, creating the 3D hardscape features, adding lighting (both daytime sunlight and nightscape artificial lights), creating planting schemes with varying levels of detail, to end up with hardcopy of plans, perspective views, materials and plant schedules – the lot!

Secondly, the practicalities: The book itself is convenient A5 size, and spiral-bound, so it lays flat within a very small footprint on your desk, or even held in one hand, while guiding your mouse with the other. It includes colour screen images or sections of them throughout, which are well-positioned to match the text. There’s a CD which holds both a PDF copy of the book and a set of Vectorworks files which constitute the sample project at various stages within the workflow and exercise files so that you can try things out without screwing up the project files.

After completing this book and project, the 3D features of Vectorworks/Landmark are completely de-mystified and just make sense as the natural way of working with the package – I found that I could easily work through my current design project alongside the book’s sample project and gain all the benefits and efficiencies which I’d been missing out on. I’m not saying that the supplied Vectorworks manuals aren't useful, but they are descriptive of what the various tools do, not how they are applied, and they seem to be written by “techies” not practitioners – which left me using only a fraction of the package in the 12-months-plus which I’d employed it. Not any more!


I do have some criticisms – there are a lot of “typos” which a better proof-reading should have found, though usually these don’t impact on comprehension. The screen-image clips are very small – presumably to keep the physical size of the book down – which is fine if you’re just using them as a visual cue to what you’re seeing on your screen as you work through the project, but sometimes they make using the book for reference difficult - unless you have much more acute vision than me.


My major criticism is that the book has no index, so to use it for reference you either have to thumb through the contents pages, which list topics within the workflow of the sample project, and then skip-read through that section; or you have to resort to the PDF copy and use Adobe reader’s “find” facilities to locate the item you need. The sample project is “split-level”, so the book does cover retaining walls, steps, raised beds and so on, but it doesn’t cover site modelling of a “real” situation where there are undulating contours and how to construct a design over this. Nor does it discuss “real” hardscape which has a rainwater run-off gradient. Perhaps these might be the subject of a future “advanced” landscape design book.

Conclusions:

Would I recommend this book? Wholeheartedly and without reservation!


Who would benefit from this book? Students of Garden Design or experienced designers who are new to Vectorworks, and those people, like me, who are experienced users of Vectorworks but who’ve shied away from some of the most productive parts of the package because they seemed “too difficult”.


One final word of caution – make sure you have the appropriate version of the Vectorworks software - the book is for Vectorworks 2009, so you can’t read the exercise and sample project files if you’re running Vectorworks 2008 or below, though you could possibly manage with a 2009 demo version on another machine. If you’re lucky enough to have Vectorworks 2010, it should work OK, but I presume there’s a revision or new edition coming along to pick up on the enhanced 2010 features.


Steve Rice, Blooming Good Gardens, Southampton, UK

Monday, 5 October 2009

Throwing Light on Garden Design

Many enthusiastic people put a lot of effort into planning their gardens, making sure that it suits their daytime needs, but often, in my experience, completely overlook extending the use of the garden into night time. Having invested money in making a garden such a splendid leisure space, why not make it usable for longer? Not only can a good lighting design offer greater flexibility in garden use during summer months, but it can also provide a magical nightscape as seen from the house or conservatory, adding drama and atmosphere to the whole scene all year round.
There are 4 main uses of outside lighting – functional lighting is used to illuminate areas such as dining and entertaining spaces on patios or terraces, or for leisure areas such as pools, hot tubs, spaces for sitting and relaxing with a book, etc; safety lighting is used to mark paths, steps, archways, walls or other obstacles, edges of pools, trip hazards and so on; security lighting would normally be used in conjunction with motion sensors to floodlight areas such as drives and sides/back of properties and outbuildings, and might also be linked in with CCTV recording, or with automatic gate or garage door systems; decorative lighting is used for creating the nightscape scenes by “painting” light onto trees, plants and hard landscape features - using light and shade, shadows, halos, silhouettes, textures, and, perhaps, colours, to transform the garden views into something which could not be achieved in daylight.
Various types of lights - more correctly called luminaires (technically lamp is the bit which gives out light, i.e. what’s loosely called a “bulb”) - can be used for these different purposes. Some are fixed onto walls or other structures, or even attached to trees; some can be set into a lawn, patio or deck; others are free-standing such as bollards alongside a drive, or as pole or spike spotlights used within planting. There are a wealth of styles for the luminaires, from traditional “coach lamp” and lantern styles through to uber-modern chic; they come in finishes of stainless, copper, brass, or colours like black and green. The lamps used can either be mains voltage or low voltage - using weather-proof transformers located near to the string of luminaires to step down the mains to a level (typically 12v or 24v) which is safe even if you accidentally chop through a cable whilst gardening. They will usually be one of 3 types depending on their purpose – most commonly tungsten-halogen (similar to those used in kitchen ceiling downlights) which offer a very wide range of light output (wattage) and beam spread, and can also be faded up & down with suitable equipment. The second type, LED lamps, are highly efficient and stay cool, so they are especially useful in situations such as deck lights or other places where accidental contact with people or animals is a possibility; they also have a very long lifetime and can give out blue, amber, red & green light as well as white light - devices are available to mix the light colours to provide an infinitely variable range of hues which can even be changed to match the mood or occasion, or can be programmed to create varying colour light shows for parties. The third main type is metal-halide lamps which give out high-powered, intense light used for the uplighting of large trees or faces of buildings.

As an aside, the cheap, solar-powered devices now widely available from garden centres, DIY stores and the like are not really viable for effective garden lighting. While the glow they emit (usually low-powered LEDs) means they themselves can be seen over a relatively short range, they do not have the power to illuminate other objects (e.g. plants, steps, etc. as described above), nor to be seen from any distance. They may just about provide “way-marking” along the sides of paths or “twinkle” lights around a small, otherwise dark, feature which is close to the viewing position. Remember too, if you use these, that they must be in a reasonably sunny area in daytime to charge them up – so no use trying to illuminate a path shaded by trees!

Unless you’re using the units to make a “design statement” (e.g. modern stainless steel on a chic terrace), the aim of a well-designed system is to see the lightscape – the results of lighting featured objects - not to see the lights themselves. Carefully considered lighting achieves this without causing “light pollution” to annoy neighbours or glare to make the scene uncomfortable.
As well as basic on/off switching, modern professional lighting systems can be designed to control all of the system, or specific parts of the system, from a portable, wireless remote control unit, with different zones allowing for multiple options of switching and dimming.
By defining which areas of the garden need lighting - deciding on the type of lighting to enhance each feature, and where lights will be placed for maximum effect - a professional lighting plan will provide a scheme to serve all needs, whether safety, security, functionality or decoration. Ideally, this will be undertaken as part of the overall garden design such that the best synergy is achieved and the practicalities of installing the lighting can be done at the same time as other disruptive hard landscaping work, saving costs against grafting on a lighting design once the “daytime” project has already been completed.
If you would like a free consultation to discuss professional outside lighting, whether as part of a new design scheme or for an existing garden, please contact me via my website.
If you fancy doing a bit of research yourself, there's an online catalogue of lighting components here, along with design advice and hints & tips.

Finally, remember that (in the UK) it is a legal requirement for outside electrical work to be carried out by a competent, “Part-P” qualified electrician. Always ask for the Part-P certificate on completion of the works – without this you may encounter difficulties if you subsequently come to sell your property.

Wednesday, 12 August 2009

Growing Our Own Food

Current news items about the effect of climate change on food availability, the need to produce greater quantities of crops nearer to home, and the end of the “cheap food” era must surely mean an increase in many people wanting productive areas as part of an overall garden design. The integration of veggie patches with ornamental gardens (if we want to be posh about it, “potagers”) is nothing new, and can be an attractive idea – though some people are put off by thinking it’s a lot of work. I’ve done projects in the past using raised beds, which can reduce the work and overcome poor soil conditions, linked to the ornamental garden by, for example, a pergola walkway. I recently visited a company called Living Leaves, who have developed a complete system for producing veg, herb & salad crops – including neat raised beds, planting plans for all-year-round crops, plants delivered to your door at just the right time, plus monthly email guides. Integrating a system like this within an overall design can give a novice client confidence that they can grow wholesome, fresh food themselves – without it being too much work, and at less cost than buying from a supermarket.

Sunday, 9 August 2009

Article on Rain Gardens

I've just had a piece published in the local magazine about rain gardens. The gist of it was:
"We’re all aware of the village roads flooding after heavy storms and we’re constantly being told of climate change and its consequences.
You may not know about last autumn’s change in planning regulations, which means that anyone paving more than five square metres of front garden has to do so in a way that prevents rainwater running off onto the highway and, therefore, into the storm water drains. Estate and property developers now have to give consideration to rainwater management, including using SUDS (Sustainable Urban Drainage Systems) to minimise the effects of rainwater during heavy downpours.
The intention of these new planning measures is to have as much rainwater as possible returned into the ground, where it can be soaked up and used by plants before naturally returning to brooks, streams and rivers. This allows the water to move in a delayed, slowed and cleaned manner, instead of as a deluge carrying pollutants from hard surfaces into the drainage system.
(You may think that this is only a problem for the cities, but consider the following small calculation. The population of the village is 2116; assuming an average of 4 people per household this gives 529 dwellings; if they are, on average, similar “roofprints” to my house, the rainwater falling on the village's roofs during a 2-hour heavy storm amounts to about 350,000 gallons (just over 1.5 million litres) – or enough to fill a 25m swimming pool 3 times over! OK, many dwellings will have soakaways instead of pouring this into the drainage system, but just imagine how much more water falls on roads, paths, drives, car parks, ...)
Whilst this new emphasis is a positive step, it still treats rainwater as a problem to be “managed”. Many people are now thinking differently, with rainwater being regarded as a resource. The established use of water butts connected to downpipes via diverters for use in the garden is increasing in popularity, although many of you will know how quickly a water butt is filled in a storm, still leaving the excess to flood into the drainage system. Some people have invested in larger rainwater “harvesting” systems, such as underground storage tanks beneath permeable-paved drives, although these are very expensive, and complex to install.
In their book “Rain Gardens” (Timber Press, 2007), Sheffield University’s Nigel Dunnett and Andy Clayden describe new concepts that combine environmental benefits and aesthetics where rainwater is not seen purely as a resource or as a problem, but is instead a visible, celebrated part of our gardens."


You can see a rain garden I recently designed here.

Thursday, 6 August 2009

Blooming Good Gardens at the New Forest Show

Last week was fun. I and four other garden designers had a stand at the New Forest Show. Business was brisk, especially on the Tuesday - the weather forecast was poor for Wednesday so maybe everyone decided that was the day to visit. We had many seemingly genuine visitors, and gave out sets of leaflets and business cards.


The week would have been perfect, had it not been for traffic problems. The first day I was on the stand, I lost my car in the evening...although I knew exactly where I'd left it. Security had other ideas though...and then on the last evening, when we wanted to dismantle the stand, heavy traffic, and an off-site road accident, led to grid-lock on the showground.